Wherein I provide you with a guided tour to taking your knitting into your own hands and knitting socks that always fit.
Click to download this article as an Adobe PDF.
Not a pattern, but a lifestyle
Although I don't have a pattern for you for sock, I have a method - and you can use it for all your sock making.
I knit on two circulars (see this excellent tutorial), but you can use the single-needle "magic loop" or multiple double pointed needles -- instructions assume you are knitting on two circs, so adjust as you need to.
This sock is knit in the round -- meaning when you cast on your stitches using the Judy's method below, you'll have stitches on two needles (needle 1 and needle 2, or top and bottom, or sole and instep – however you would prefer to think about it.) In order to get stocking stitch while knitting in the round, you simply knit every row. Stockinette magically appears. No purling needed for stockinette. Of course, you will need to purl for ribbing, or cabling etc.
Yarn
Use any size yarn desired. I usually use a fine sock yarn that knits up nicely with a size 1 or 2 US needle. Yardage varies dependent on how big and how long you make the sock. 400 yards will yield a standard length women's size 9-10 pair of socks.
Needle Size
Use the needle appropriate to your yarn. Most sock weight yarn works well with needle sizes between US 1 up to 3. As this pattern is sized as you go, no gauge swatch is needed. So, pick the needle size that makes your yarn look good.
Start at the toe with Judy Brecker's Brilliant Cast on
Increase for the Toe
Round 1: Increase two stitches each needle, for four increases total. I normally increase one stitch in from edge of each needle. I do not increase at the edge stitches. The type of increase I make depends on the sock. Lace? Use a Yarn over, Want a neat line? Knit two stitches into one. Try all sorts of increases!
Round 2: Knit.
Repeat these two rounds until you have a wedge that fits your toe with only a little wiggle room.
Knit until it is time for the heel (Make the foot part)
Knit to your heart's desire, any pattern you choose. I usually make the sole part of the sock (one of your needles) stocking stitch /stockinette. The other needle is the top of your foot - knit any pattern you want. Adjust stitch count by 1 or two stitches to accommodate your chosen pattern. When you are just about 1.5†- 2" short of the heel, stop!
Time to knit the heel
Knit the no muss, no fuss, no crazy yarnovers short row heel designed by Priscilla Wild and used with her permission. Of all the methods for making a short row heel, this one wins, hands down.
Ignore the needle that holds the stitches that are the top of the foot, time to focus on creating your heel. With the stitches on your "heel" needle, follow these directions for creating a short-row heel.
(This is Priscilla Wild's recipe using 30 stitches. Adjust to the number of stitches on your heel needle.)
30 sts
k to next to last stitch, turn
slip stitch (SS) , purl 27( to next to last stitch) turn
SS, k 26, turn,
SS, p 25, turn,
SS, k 24, turn,
SS, p 23, turn,
SS, k 22, turn,
SS, p 21, turn,
SS k 20, turn,
SS, p 19 , turn,
SS, k 18, turn,
SS, p 17, turn,
SS, k 16, turn,
SS, p 15, turn,
SS, k 14, turn,
SS, p 13, turn,
SS, k 12, turn,
SS, p 11, turn,
SS, K 10, turn,
SS, P 9, turn,
SS, K 8 turn
**Go to first stitch next to the first hole , p2tog, (note, you are purling together the 2 stitches on either side of the first hole) pick up 1 stitch with right needle ( put needle through the top loop of the gap and pull through a new loop with yarn, as if you, were picking up instep stitches) in the next hole, between the next two stitches.
Turn,
Slip that picked up stitch to left needle, knit across to stitch next to first hole, k2tog, pick up one stitch in next hole with right needle,
Turn**
Repeat between the** ’s until all stitches are back in work, simply picking up a stitch on the end loop when at the end of the increasing .
Note, once you have done a few rows on the decrease portion, you don’t need to count, just make a hole by turning next to the last stitch of the next hole. On the increasing portion always k or p together the 2 stitches on either side of the next hole, then pick up stitch in the space next to your needle, turn and slip that picked up stitch. The picked up stitches are, in essence, increases filling in a hole and making up for the k2tog decreases that close a hole. This method leaves no loops and no holes.
Amazing, eh? Thank you Priscilla!.
Try on the sock as you are knitting it to make adjustments to the fit as you go. Be really clever and knit two on your circs at once. (You will need to have two balls of yarn for this - although I know folks that knit one sock from the center and one sock from the outside of the band, but that, my friend, is beyond me.)
When you are happy with the foot and now lovely heel of your sock, you'll go back to knitting in the round on both of your circular needles.
Knit the leg as you desire
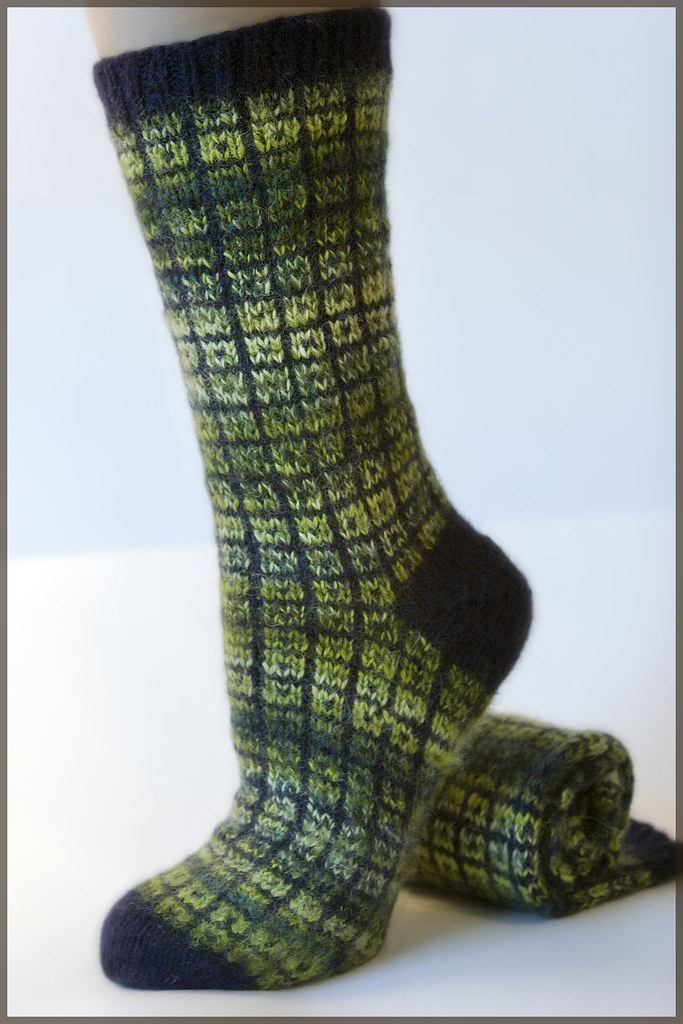
In the examples with this pattern, in the foot portion I used a ribbing (k2, p2) for the kool-aid socks, and a 2-color simple design for the blue/green samples.
Finish off with a lovely garter edge
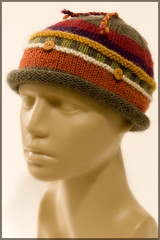
For a comfortable good looking end to your project (and a nod to Elizabeth Zimmermann), finish off your sock with knitting 3/4" to 1" of garter stitch. The orange/brown example has this garter edge.
Garter stitch knit-in-the-round is done differently than when knitting back and forth. Here's how you do it:
Row 1: knit
Row 2: purl
This makes one ridge of garter stitch. Repeat until you have as much garter pattern as you want.
Cast off with EZ's sewn cast off
Knitty has a beautiful description of this fantastic cast-off with photographs. Scroll down to the "Elizabeth Zimmermann's sewn bind off". The sewn cast off is well suited to garter stitch and will never frustrate you with being too tight!
If you want to play with creating self-striping socks like the orange/brown ones, see my online self-striping tutorial.
And, there you have it! A can't miss method of sock-making that will keep you busy for years to come!
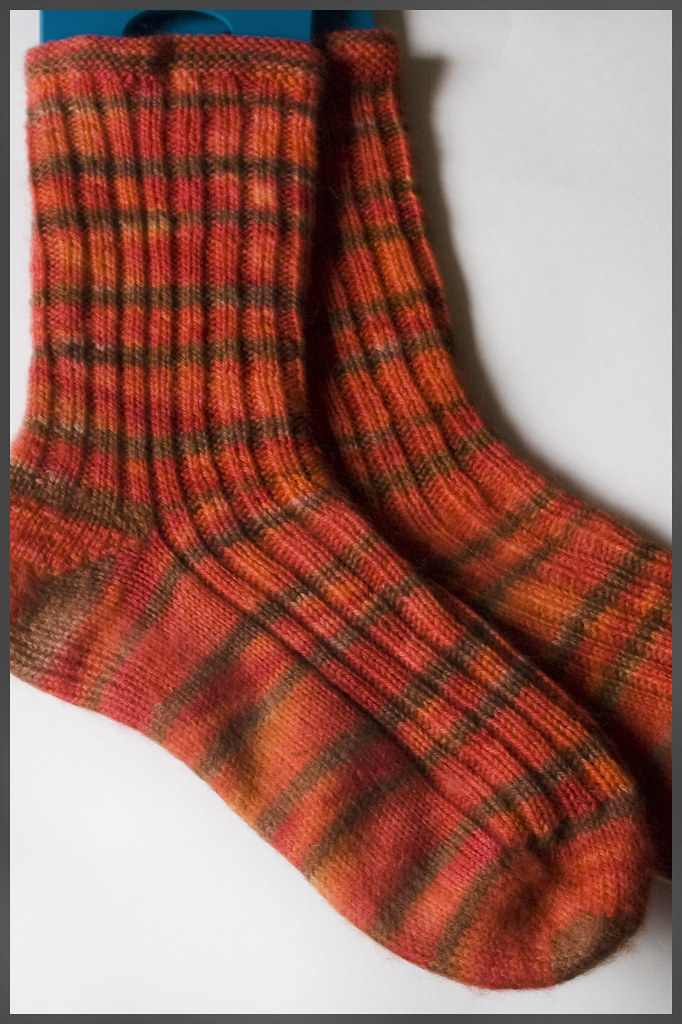
Photo Illustrations in this Guide
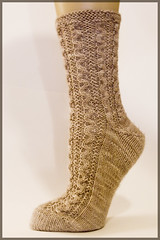
Square Socks – blue/green
designed and knitted by Charisa Martin Cairn
Fiber: recycled cashmere sweater (navy) and handspun/handdyed BFL 2-ply sock yarn
(spun by Kristin Pounders)
Self-striping socks- orange/brown
designed and knitted by Charisa Martin Cairn
Fiber: Knit Picks Bare, sock weight; wound off on self-striping warp board, then removed and dyed with Kool-Aid: orange, cherry, and grape. (Grape mixed with orange = brown.)
--------------------------------------------------------------------------
Online references used in this sock-making article:
Knitting on two circular needles
Judy Brecker’s perfectly magical cast on
Priscilla Wild's Short Rowing, No Wrapping, No Unwrapping, No holes, No counting, No muss, No fuss, No loops Short Row heel instructions - http://groups.yahoo.com/group/Socknitters (you must be a member of this Yahoo group to access the file, however, it is reprinted here in this article with Priscilla's permission.)
Elizabeth Zimmermann’s Stretchy Sewn Cast Off


No comments:
Post a Comment
Your comments appreciated.