Sometimes it just feels good to return home. And if you can't do that...then, return to behavior that feels like coming home. Spinning has been that for me this Winter. Using my hands and wheel to make yarn. Using the yarn to make luxurious items that only hands and love can do.
Click to view a larger image


With spinning comes dyeing. My local knitting group took a class from a spinning guild last month. They taught us how to wrap yarn on stations of pegs on a warp board, wrapping top to bottom, then back up in the reverse sequence, and repeating the process until all the wool yarn was wrapped on the board. Tie it off, then dye the separate circles of yarn to create self-striping yarn. In my enthusiasm for the concept - I quickly purchased wood board and dowels at my local home supply store, and made a large warping board. My intent was to create Noro-yarn-like long color repeats, but with wonderful fiber. (Noro is not wool I really enjoy knitting, but the color is so seductive that I buy it at $12.95USD a skein anyway.)
What follows is my thinking process on creating self-striping yarn along with what I learned at the Snohomish Spinners Guild:
Warp Board and Wrapping Sequences for Creating Self-Striping Yarn
The board: Purchased a 2'x4' MDF board at Home Depot, and had them cut the board in half, yeilding a 2'x2' board. Then, I drilled 2 holes 18" apart + another hole 2" farther from the last, 6 times on the board (see the diagram below). The total number of peg stations is up to you. I chose six because that's how many the Noro I looked at had, and that is what I am trying to duplicate. I cut dowel to about 4-5" each, and hammered/glued them into the drilled holes.
When you wrap the yarn, do it around the outer pegs. 1 wrap = 1 yard. The inside set of pegs are for placing the wet wool on (because the yarn shrinks) after you have finished the dye part of the process. You'll leave the wet wool on the pegs until dry. Then you unwrap into skeins from the warp board. Read this whole entry on self-striping before proceeding!
Below are two diagrams that illustrate a couple of ways to wrap sequences for dyeing self-striping yarn. If you want to create changing stripe widths, change the number of times you go around each set of pegs (stations).
On the left diagram, the wrap sequence gives you 12 3 4 5 6 5 4 3 2 1 2 (etc) color repeats. Play with the number of wraps per station to give varying stripe widths when you dye the yarn. Start at the top right peg, and wrap according to the arrows indicated.
On the right diagram, each station is wrapped 8 times and the order that you wrap the yarn is to give a 1 2 3 4 5 6 1 2 3 4 5 6 color sequence. Start on the right-most peg and wrap in the order indicated. On the final station, wrap only 7 times. You'll dye the carrying yarn the same as station 6.
After wrapping all the yarn on the warp board, tie each circle or length of yarn loosely with white cotton yarn. For the wrapping sequence in which the yarn crosses itself, tie an X to secure the intersection. After you have ensured all the loops are tied well (but loosely), remove the yarn from the warp board. Prepare your yarn as usual. (soaking it to wet it, and adding a wetting agent like Synthrapol or shampoo). Paint in sequence and set the dyed yarn. Here is a brief overview of hand painting. The directions in the link are for painting roving, but the process is similar with one difference: make sure your "circles" of yarn are painted separately and wrapped separately from each other with plastic wrap or you'll have color migration when you heat/set the wool yarn.
Enough with the talk, here's how a couple of projects look when wrapped in uneven amounts (8 wraps,4 wraps,6 wraps per station on the warp board) according to the above diagram on the left, wrapping only 3 stations, creating a 123212321 sequence of varying width stripes. As you can see, based on the number of times you wrap a station, and how you dye it, the variety can be astounding! The two samples below are wool and dyed with kool-aid. The project on the left is handspun.
(click to see a larger image, hit the back button to return.)

Reclaimed Fiber
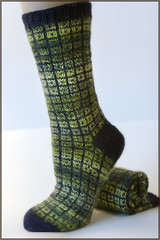
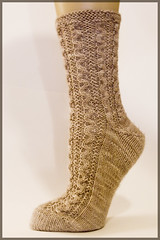
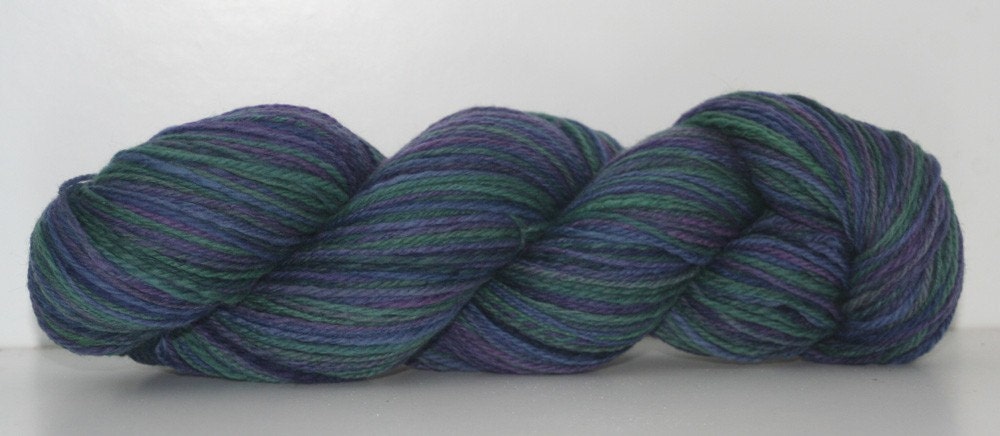
While I played with fiber this Winter, I learned about reclaiming fiber from already-knitted sweaters. A knitting buddy helped me see that spending a bit of time to unwind a cashmere sweather and then re-plying and dying it (if necessary) might well be worth it . Cashmere for spinning generally goes for $30USD an ounce. Here are my first reclaimed skeins - indeed, the yield is high when you unwind a sweater.
First photo: wool/cashmere/angora blend - no dyeing necessary; Second photo: Shetland, dyed in purple/green skeins
Click to see a larger photo.

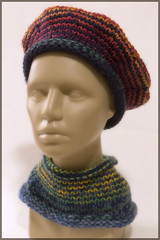
Here is an in-progress project using the wool/cashmere/angora blend along with handspun (the green) by one of my knitting buds, Kristin. Click to see a bigger version.

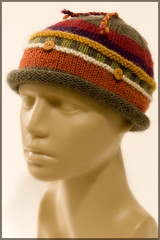
Finished Object
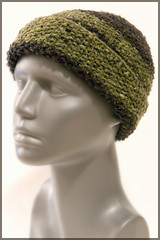
Amidst all this sampling and spinning, I do have a finished object or two. Witness: A hemp/wool Beret with a picot edge. I knit this from the top-down, using Yarn overs instead of M1 for the increases to make it lacy. When I got to the body, I had a multiple of seven. Perfect! I used the lace pattern from the E.Z. baby sweater recently finished (see my earlier post on a baby sweater). Then, to finish, I made a picot edge hem, cast-off, and sewed the hem. It wears and wears! (Click the image to see a bigger photo)

I'll leave you with a little easter egg* and some merino, freshly spun:
Spring is scenting the air. We mowed the lawn for the first time this season. It is finally light outside past 5pm. Hooray.
* This is one of the results of my first attempt at dyeing fiber on a "Dye day" with my bud Kristin. I still have the roving waiting to be spun, but I shared some of the dyed wool with her. She already spun it and sold it at her shop. The "easter egg" link is to a photo she used to sell it the yarn spun from the dyed roving. If you are looking for amazing yarn, handspun and handdyed, you cannot beat her colorways, quality and price.


No comments:
Post a Comment
Your comments appreciated.